Uploading files

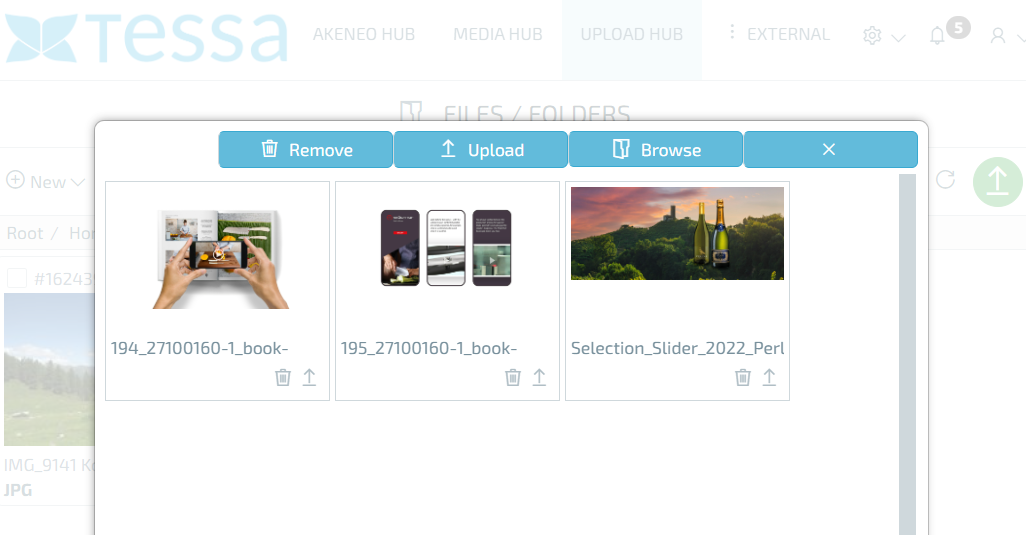
Clicking on the upload button in the home directory opens a new window in which you can collect the images for uploading to TESSA.
This is possible in several ways, you can drag & drop any number of files onto the window or you can click on the ‘Select’ button and select the appropriate images in the file picker. You can also add more files to the list later in the same way.
As soon as you have selected the appropriate files, they will be displayed in the upload window with a small preview, the file name and the file size.
Using the ‘Remove file’ button below each file, you can now remove all files from the list that you do not want to upload. If you only want to upload individual files from the list, you can do this with the ‘Upload file’ function.
As soon as the list only contains images that you want to upload to TESSA, you only need to press the ‘Upload’ button and all images will be uploaded. To make it easier to estimate how long it will take, you will see a progress bar per image and in total during the upload. Once the upload is complete, you can close the window using the ‘X’ button and return to your root directory.