Share / Publish
You have now learned how to upload images to your TESSA, convert them into assets, edit them, manage them and combine them into collections. Now it’s time to teach you how to publish them and make them known to the world.
You can either publish assets directly or assign them to a collection first and then publish the entire collection. You can publish collections using the ‘Share / Publish’ function.

To publish a single asset, simply open the context menu and select the ‘Share’ option.
As soon as you click on the button or select the function, a new dialog opens in which you have to enter the details of the publication.
First of all, you must give your publication a name, by default this is already pre-filled with the name of the collection and the numbering of the publication.
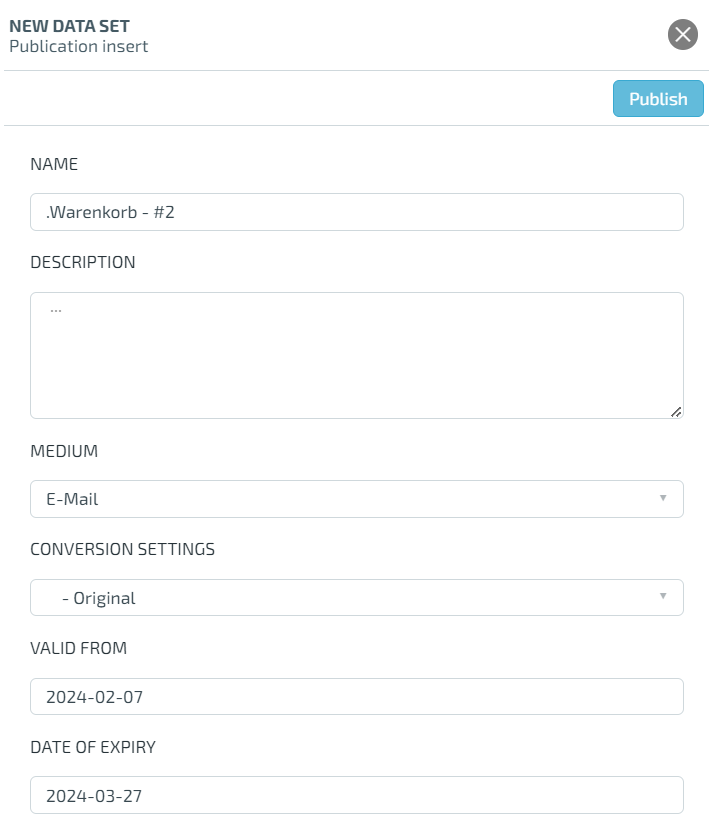
You can add a description to describe the purpose of the publication in more detail.
You can then select the medium of publication, which you can choose here depends on the configuration of your TESSA, normally you have the following options:
- Email: You send a download link in an e-mail
- Download: You directly generate a download, which combines all assets of the collection into one .ZIP file
- Link: You generate a link that allows the user to download all images in a collection as a .ZIP file
- Portal: You make the images available for download on a specially generated web portal
- JSON: The entire content of the collection is converted into a JSON format
- FTP: The content of the collection is transferred directly to a selected FTP server
- Export: The content of the collection is transferred to an export directory of your choice and is available for download there
- ARCHIVE: The content of the collection is transferred to a Formlabel archive directory
Depending on the selected medium, you can select further information for the publication, for example you must enter the recipients, subject and content of the e-mail in E-mail. When publishing via FTP, the host/IP, identifier, port and password must be entered.
You can also choose between various conversion settings, for example whether the images should be sent in their original format or as CMYK. The options available to you here depend on the configuration of your TESSA.
Last but not least, you can choose from and until when your publication should be valid. This is particularly important if, for example, you only want to publish images of a new product on a certain date or if a download link should only be valid for one week.